|
Tips for Teaching
Beginning Flute |
Getting Started
Teachers may use the following steps to guide beginning flute students in the first few sessions:
-
Begin with the lips together in a natural position (every set of lips will vary somewhat), teeth apart and jaw relaxed. Say “pooh,” releasing the air outward through a small, relaxed hole in the lips (without puckering!) and allowing some air in the cheeks.
-
Bring the headjoint (without the rest of the flute) to the bottom lip. Be sure to feel the bottom edge of the embouchure hole on the bottom lip, covering approximately ¼ of the embouchure hole with a small portion of the bottom lip (do not cover the entire hole with both lips and then roll out – this will often lead to an incorrect lip-to-flute placement). Repeat step 1, blowing air over the hole with a “pooh” release. One must blow across the hole, not into it – do not cover the embouchure hole completely and blow into the flute – simply blow across the hole. It is very helpful for beginning students to have a mirror, so they can see what they are doing.
-
Continue step 2 several times. If light-headedness occurs, take a short break. Try blowing a little bit longer each time. Do this while keeping the headjoint open, then closing it with the right hand.
-
Work towards getting at least 4 separate pitches with the headjoint alone. For lower notes, blow more downward; for higher notes, angle the air more upwards with the bottom lip, create a smaller hole in the lips (this is done by keeping the lips closer together), and use more air. You should be able to get 2 lower notes (closed tube, open tube), and 2 higher notes (closed tube, open tube), and possibly a very high note with the closed tube. It is not necessary to pinch the corners of the mouth, thereby tightening the face – always try to remain relaxed and as natural as possible. Once a good sound is achieved, continue with a “tooh” articulation – the tongue may strike in a similar place where it would be to say the word “tea” (you may need to wait until several lessons have taken place before introducing articulation).
-
Assemble the flute; it is imperative to show your students how to put the flute together in the first lesson, or they will try to figure it out themselves, possibly resulting in damage to the instrument. Gently grasp the footjoint with the right thumb on the C-sharp key; attach it to the bottom of the flute body using a gentle turning motion – DO NOT pivot or rock the footjoint back and forth, as this will deform the tenon, causing it to not fit properly (making it too loose or too tight). Insert the headjoint into the top of the flute body – again, be gentle – don’t shove it in – just slide gently using a turning motion. Line up the flute so the middle of the embouchure hole is in line with the center of the keys on the body. The main rod of the footjoint should also be centered with the middle of the keys on the body.
-
Show students how to take the instrument apart, how to clean it (all flutes should come with a cleaning rod – preferably wooden or plastic), and how to place it back in its case correctly. Be sure to clean the headjoint especially well – put a little extra fabric from the cleaning cloth (preferably silk or cotton) into the headjoint before inserting the cleaning rod, so you are sure to get all the moisture away from the cork at the top of the headjoint. DO NOT store the cleaning cloth (or anything else) inside the case with the flute – it will keep moisture in, and it may damage (bend, etc.) the instrument. Also, DO NOT leave any kind of cleaning device inside the flute body – this will keep excess moisture from being able to evaporate.
-
It is advisable to use a good method book and to acquire a fingering chart. The Rubank Method for Flute (Beginner, Intermediate, Advanced I, Advanced II) seems to coincide very well with the American band curriculum.
Posture/Stance
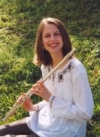
The position for playing flute is not one that feels very natural. This being the case, it is very easy to start feeling tension-related pain if one is not careful. I encourage students to try to maintain as natural a stance as possible, whether sitting or standing. For solo, chamber, concert band, and orchestral playing, I teach the following position:
When standing, keep the feet at a comfortable distance (approximately shoulder width) apart; line up the hips over the ankles, and the shoulders over the hips. Hold the flute vertically in front of the body (similar to a recorder), then bring it up so the headjoint meets the left shoulder. In this way, the back remains straight and does not bend in an unnatural way. Turn the head towards the left shoulder, and bring the flute to the lips. Do this without craning the neck forward, causing unnecessary tension. You will notice that this position keeps the back straight, the shoulders relaxed, and the front of the body open for effective breathing. The flute does not need to be parallel to the ground – just be certain that the hole in the lips lines up with the hole in the flute. A mirror is a helpful tool for this.
When sitting, I advocate sitting somewhat diagonally on the front right edge of the chair with both feet on the ground. In this manner, one can sit very similarly to how one would stand, with the shoulders over the hips, while the head turns to the left to be met by the flute. The body will face somewhat to the right (about 45 degrees), but the flute and head will be forward for proper projection. Do not hesitate to shift positions every now and then to avoid stiffness and tension.
In marching band the flute is a very visual instrument and therefore concert posture cannot be used. The flutist will want to maintain very accurate angles, keeping the instrument parallel to the ground at a 90-degree angle with the body. This will cause some twisting in the back, because the right shoulder is forced back. I recommend trying to remain as relaxed as possible and to stretch frequently.
| If you would like to be added to the TSMP Email Mailing List and receive periodic notifications of new articles and updates to this website, then please email TSMP.
The Texas School Music
Project is a source for ideas and information
concerning pedagogical
practices in the music classroom or rehearsal hall. The TSMP is a service provided to
all music specialists by the faculty
of
the Department of Music
at Stephen F. Austin State University. Copyright ? 2002, Department
of Music at Stephen F. Austin State University |