|
Making a Drum Out of a Bucket by |

Supplies:
|
Here are some simple directions on how to construct a set of drums.
|
Watch a short demonstration video! |
|
| Video - "Making a Drum Out of a Bucket" | - 256K - broadband connection | 56K - dial-up connection |
Assembly:
| 1. Rinse buckets and remove wire handles. | |
| 2. Set aside six buckets. These will be the heads of the drums. | |
| 3. Cut the remaining buckets in half with hacksaw. Keep the top part of the drum and throw away the bottom. These will be called "collars." Once all buckets have been cut and then stacked together you should be able to crawl through them (if you were two-years-old). | 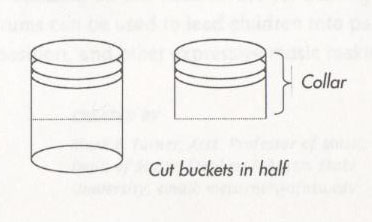 |
| 4. Set the six buckets you set aside. Five of these will have "collars" added to them to make different sounds. Once you decide how many collars each bucket will have take them out as a set and fasten them together with the wood screws. Add hot glue to the ends of the screws for added safety. | 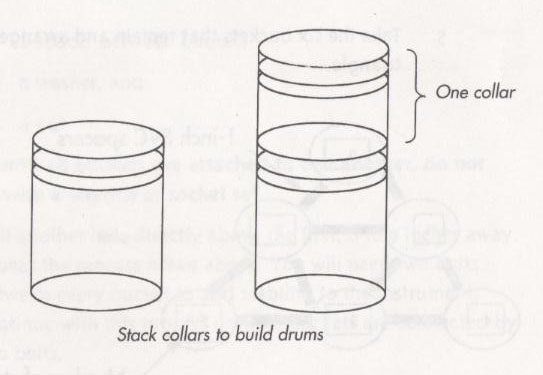 |
| 5. Take the six buckets that remain and arrange them to make a triangle. | 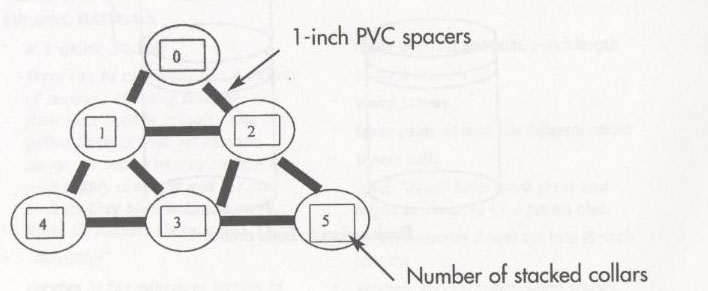 |
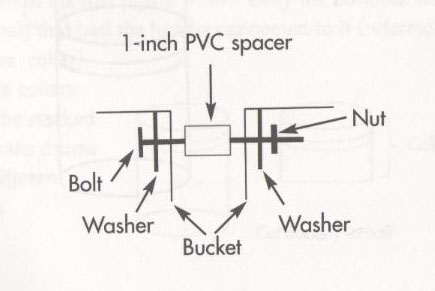
| 6. With the 3/8 inch drill, drill a hole into the side of one of the buckets about two inches from the bottom. Using the first hole as a guide, use a permanent marker to mark a similar spot on another bucket. Drill hole. | |
| 7. Place a 3/8 inch bolt with washers on
both ends into the holes to connect the buckets. Be sure to place a pvc
spacer between the buckets. Note: Until all buckets are attached to one another do not tighten with a wrench. Thumb tighten at first.
|
 |
| 8. Drill another hole directly above the first, 6 - 9 inches away. You will create pairs of connections. Each bucket will be attached to another bucket by a set of bolt/washer/pvc spacer "thingys." See figure above | |
| 9. Once all drums are attached, tighten snuggly with wrench. | |
| 10. Apply hot glue to the ends of the bolts so that the nuts will not loosen. | |
| 11. Place collars into the assembled buckets and fasten with screws (apply hot glue to the ends.) | |
| 12. Paint the heads of the drums with "lead-free" spray paint. | |
| 13. Enjoy. |
| If you would like to be added to the TSMP Email Mailing List and receive periodic notifications of new articles and updates to this website, then please email TSMP.
The Texas School Music
Project is a source for ideas and information
concerning pedagogical
practices in the music classroom or rehearsal hall. The TSMP is a service provided to
all music specialists by the faculty
of
the Department of Music
at Stephen F. Austin State University. Copyright ? 2002, Department of Music at Stephen F. Austin State University |